Skip to main content Procedures
Startup Procedure
- Turn on air pressure using Air Inlet
- Verify pressure on Pressure Regulator is approximately 0.45 MPa
- Turn on power using the Power Switch on the control box
- Switch key to “ON” (clockwise)
- Press green power button
- Wait for system to boot
Shutdown Procedure
- Park any installed tooling (Home screen > Park)
- Press green power button
- Switch key to ‘OFF’ position (counter-clockwise)
- Turn off main power
- Turn off air
Running Program
- Insert USB device into the control panel
- Copy project file from USB
- From the control screen
- Setup > Program Manager
- Select “USB” tab on left
- Select desired file (.PRG extension)
- Can sort by name, date, size
- With file selected, press “Copy”
- Select “Programs” tab on left
- Select “Paste”
- Verify GCode
- From control screen
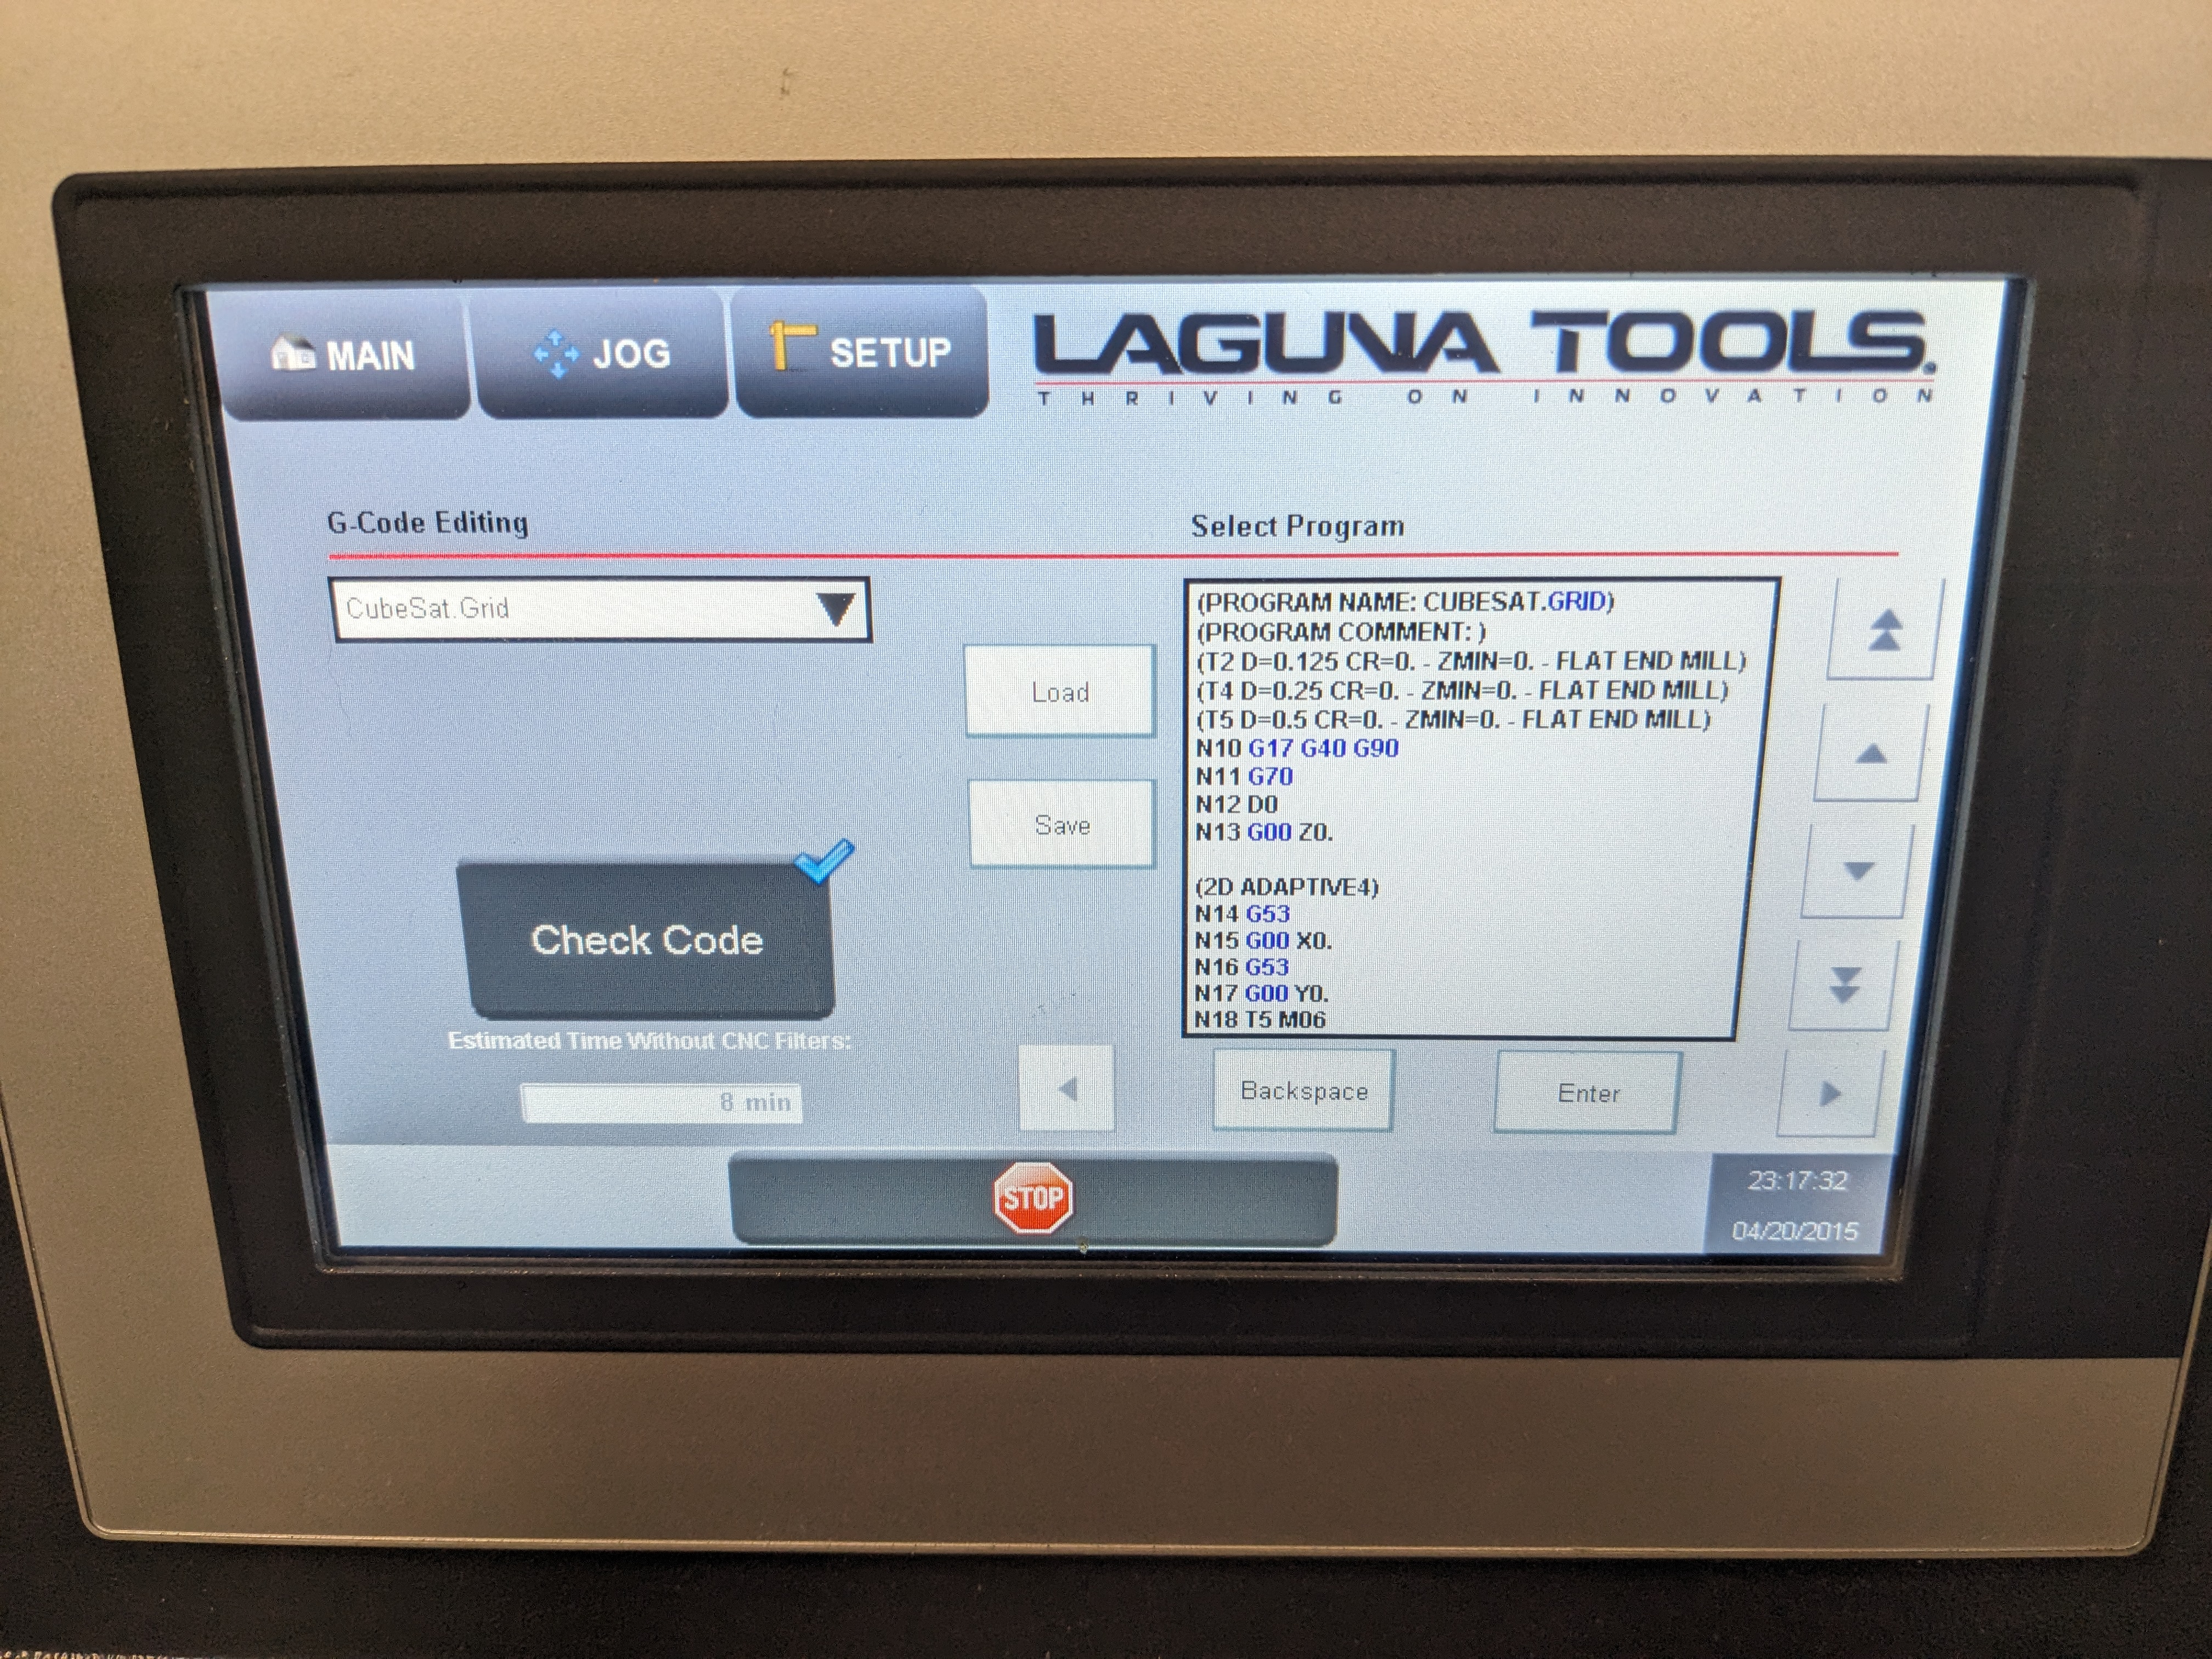
- Setup > Verify G-Code
- If program not already select use drop down to select
- Select “Load”
- Select “Check Code”
- Wait for check to complete, indicated by a blue check mark or a reported error

- Load a tool into the toolhead (if not already loaded)
- Option 1 - Auto Touchoff (Recommended)
- Setup > CNC Tool Data
- Select tool number from dropdown
- Select “Execute Automatic Touch On/Off”
- Option 2 - MDI Command (Advanced)
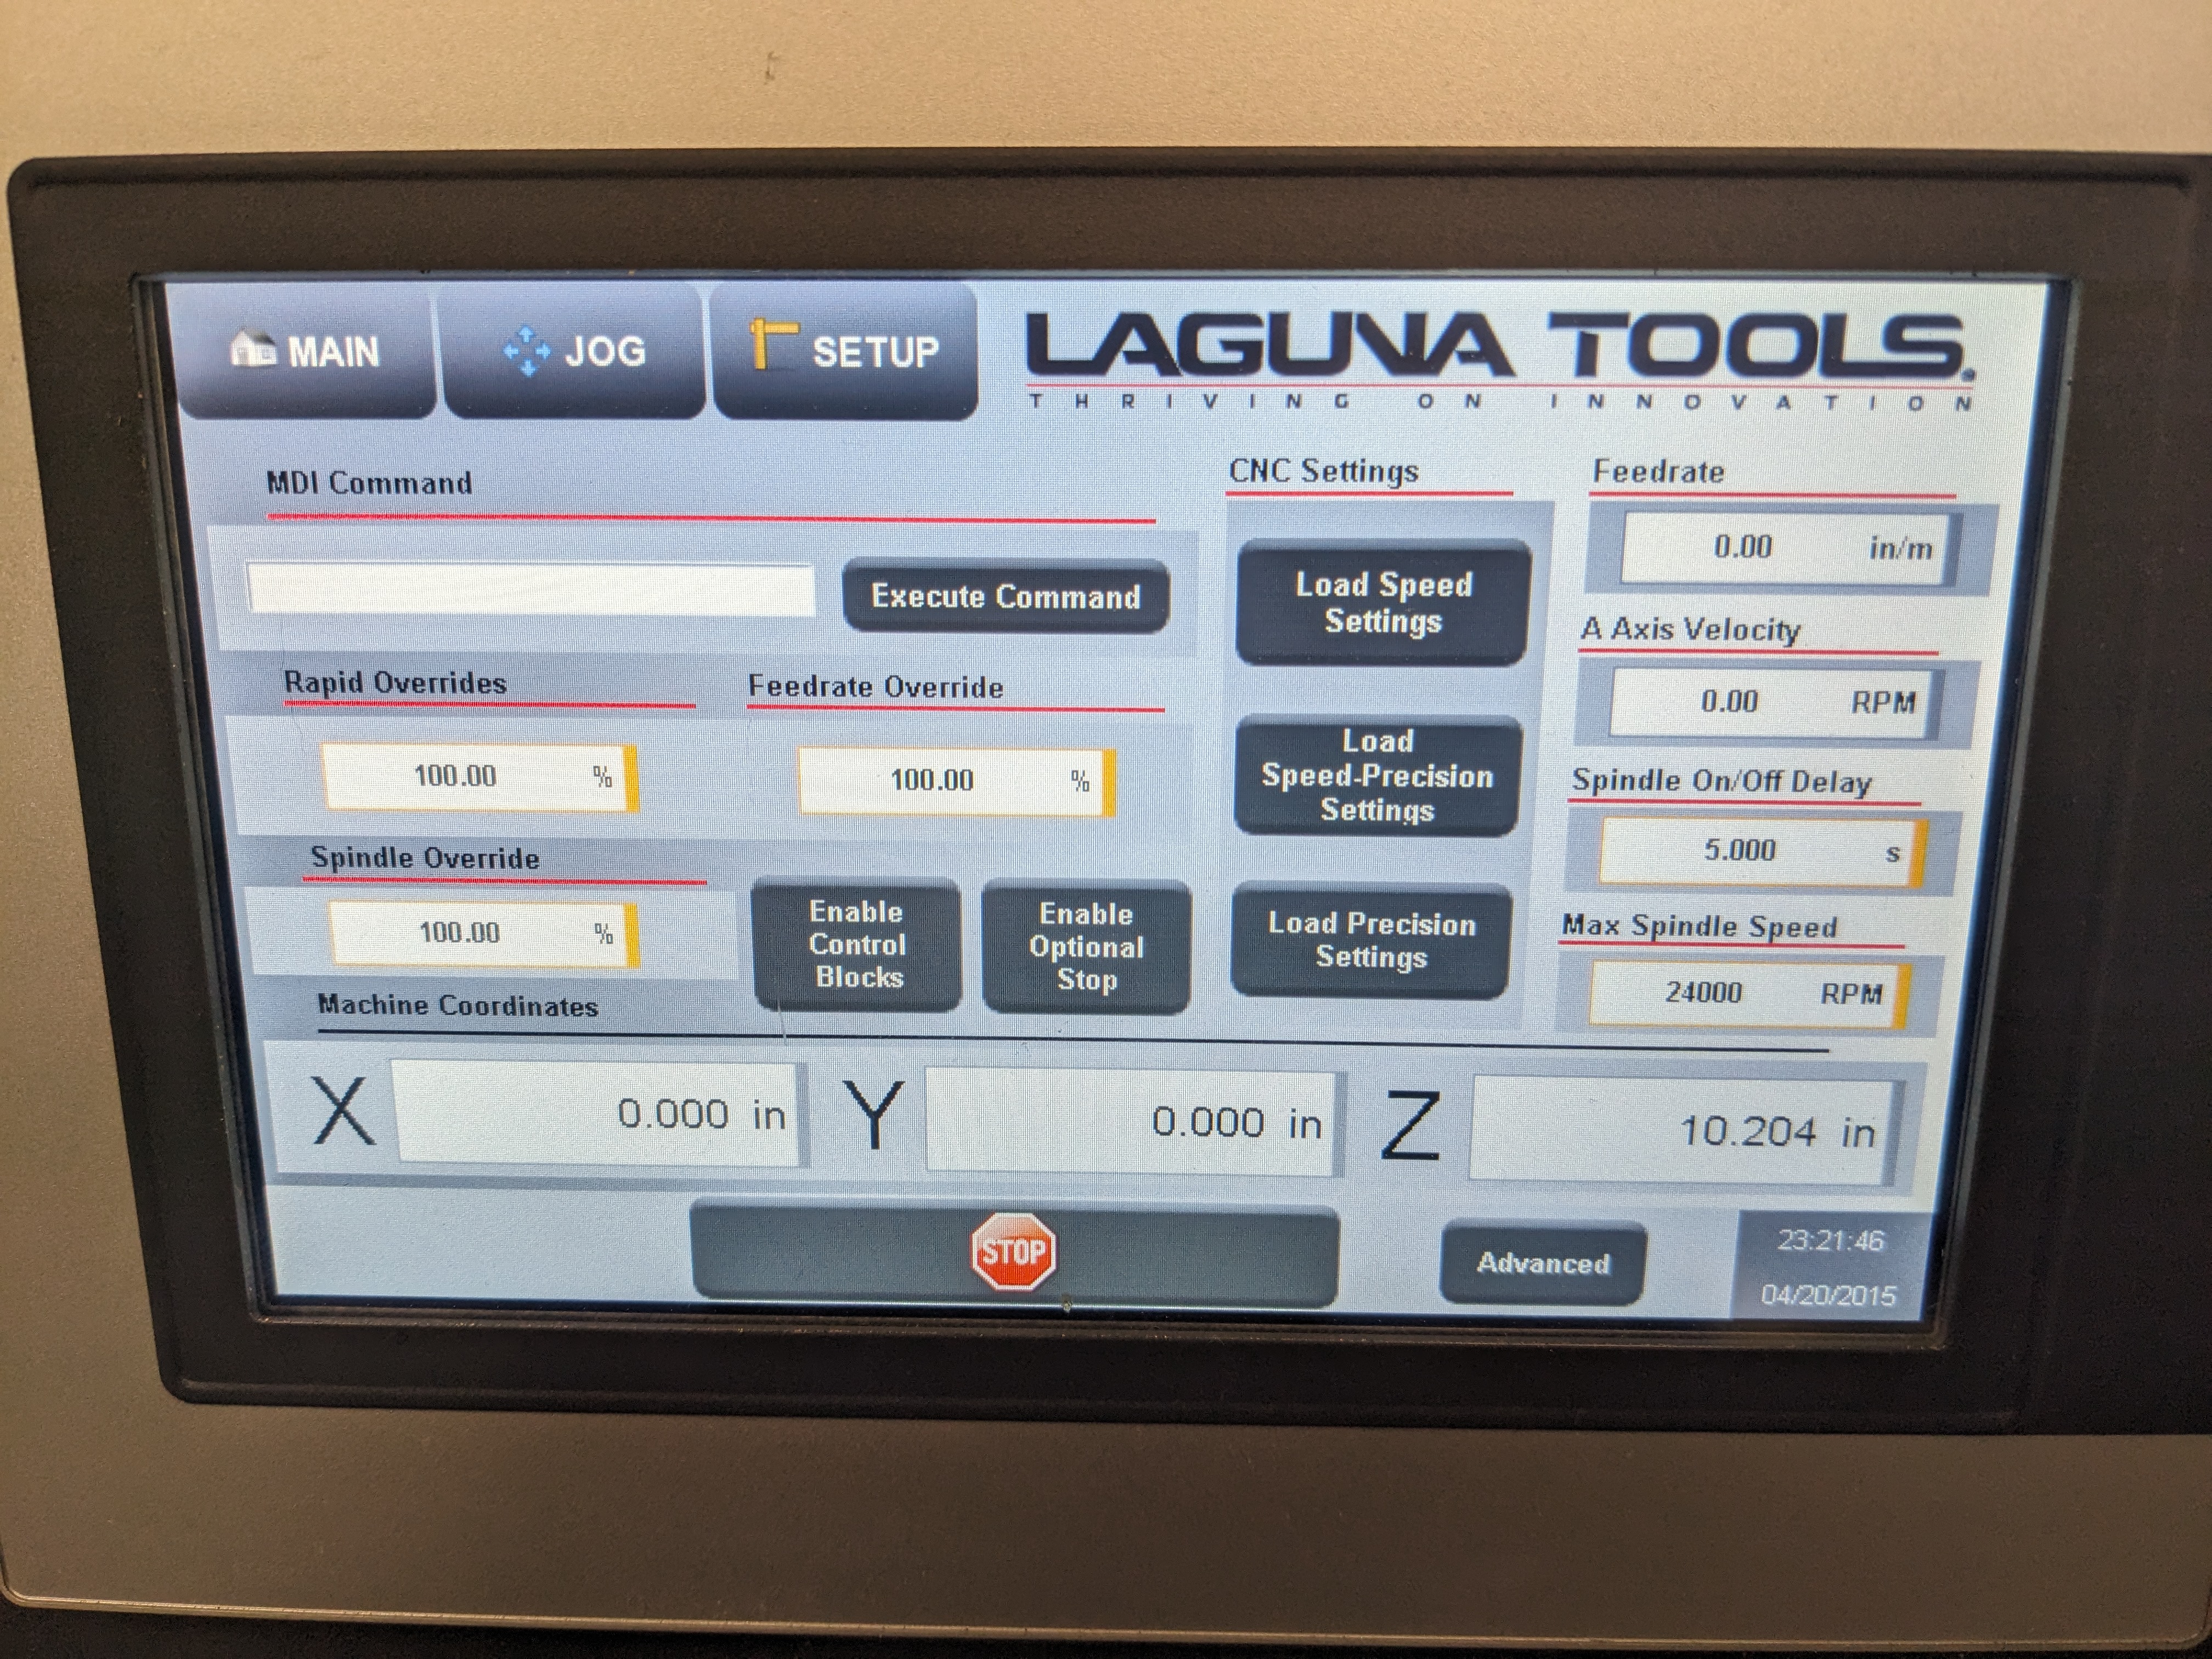
- Setup > CNC Settings
- MDI Command
- “M06 T<tool number>” e.g.
M06 T2 // load tool #2
- Position the toolhead at the X,Y origin of the stock
- Use the handheld remote to manually jog the toolhead
- Press and hold the “Enable Switch” on the remote to allow motion
- Will automatically open the “JOG” screen
- Select movement axis using left dial (X,Y,Z,4)
- Mill does not currently have a 4th axis
- Select the movement multiplier using the right dial (1x,10x,100x)
- Avoid using the 100x multiplier when moving the Z axis, it could result in bit breakage
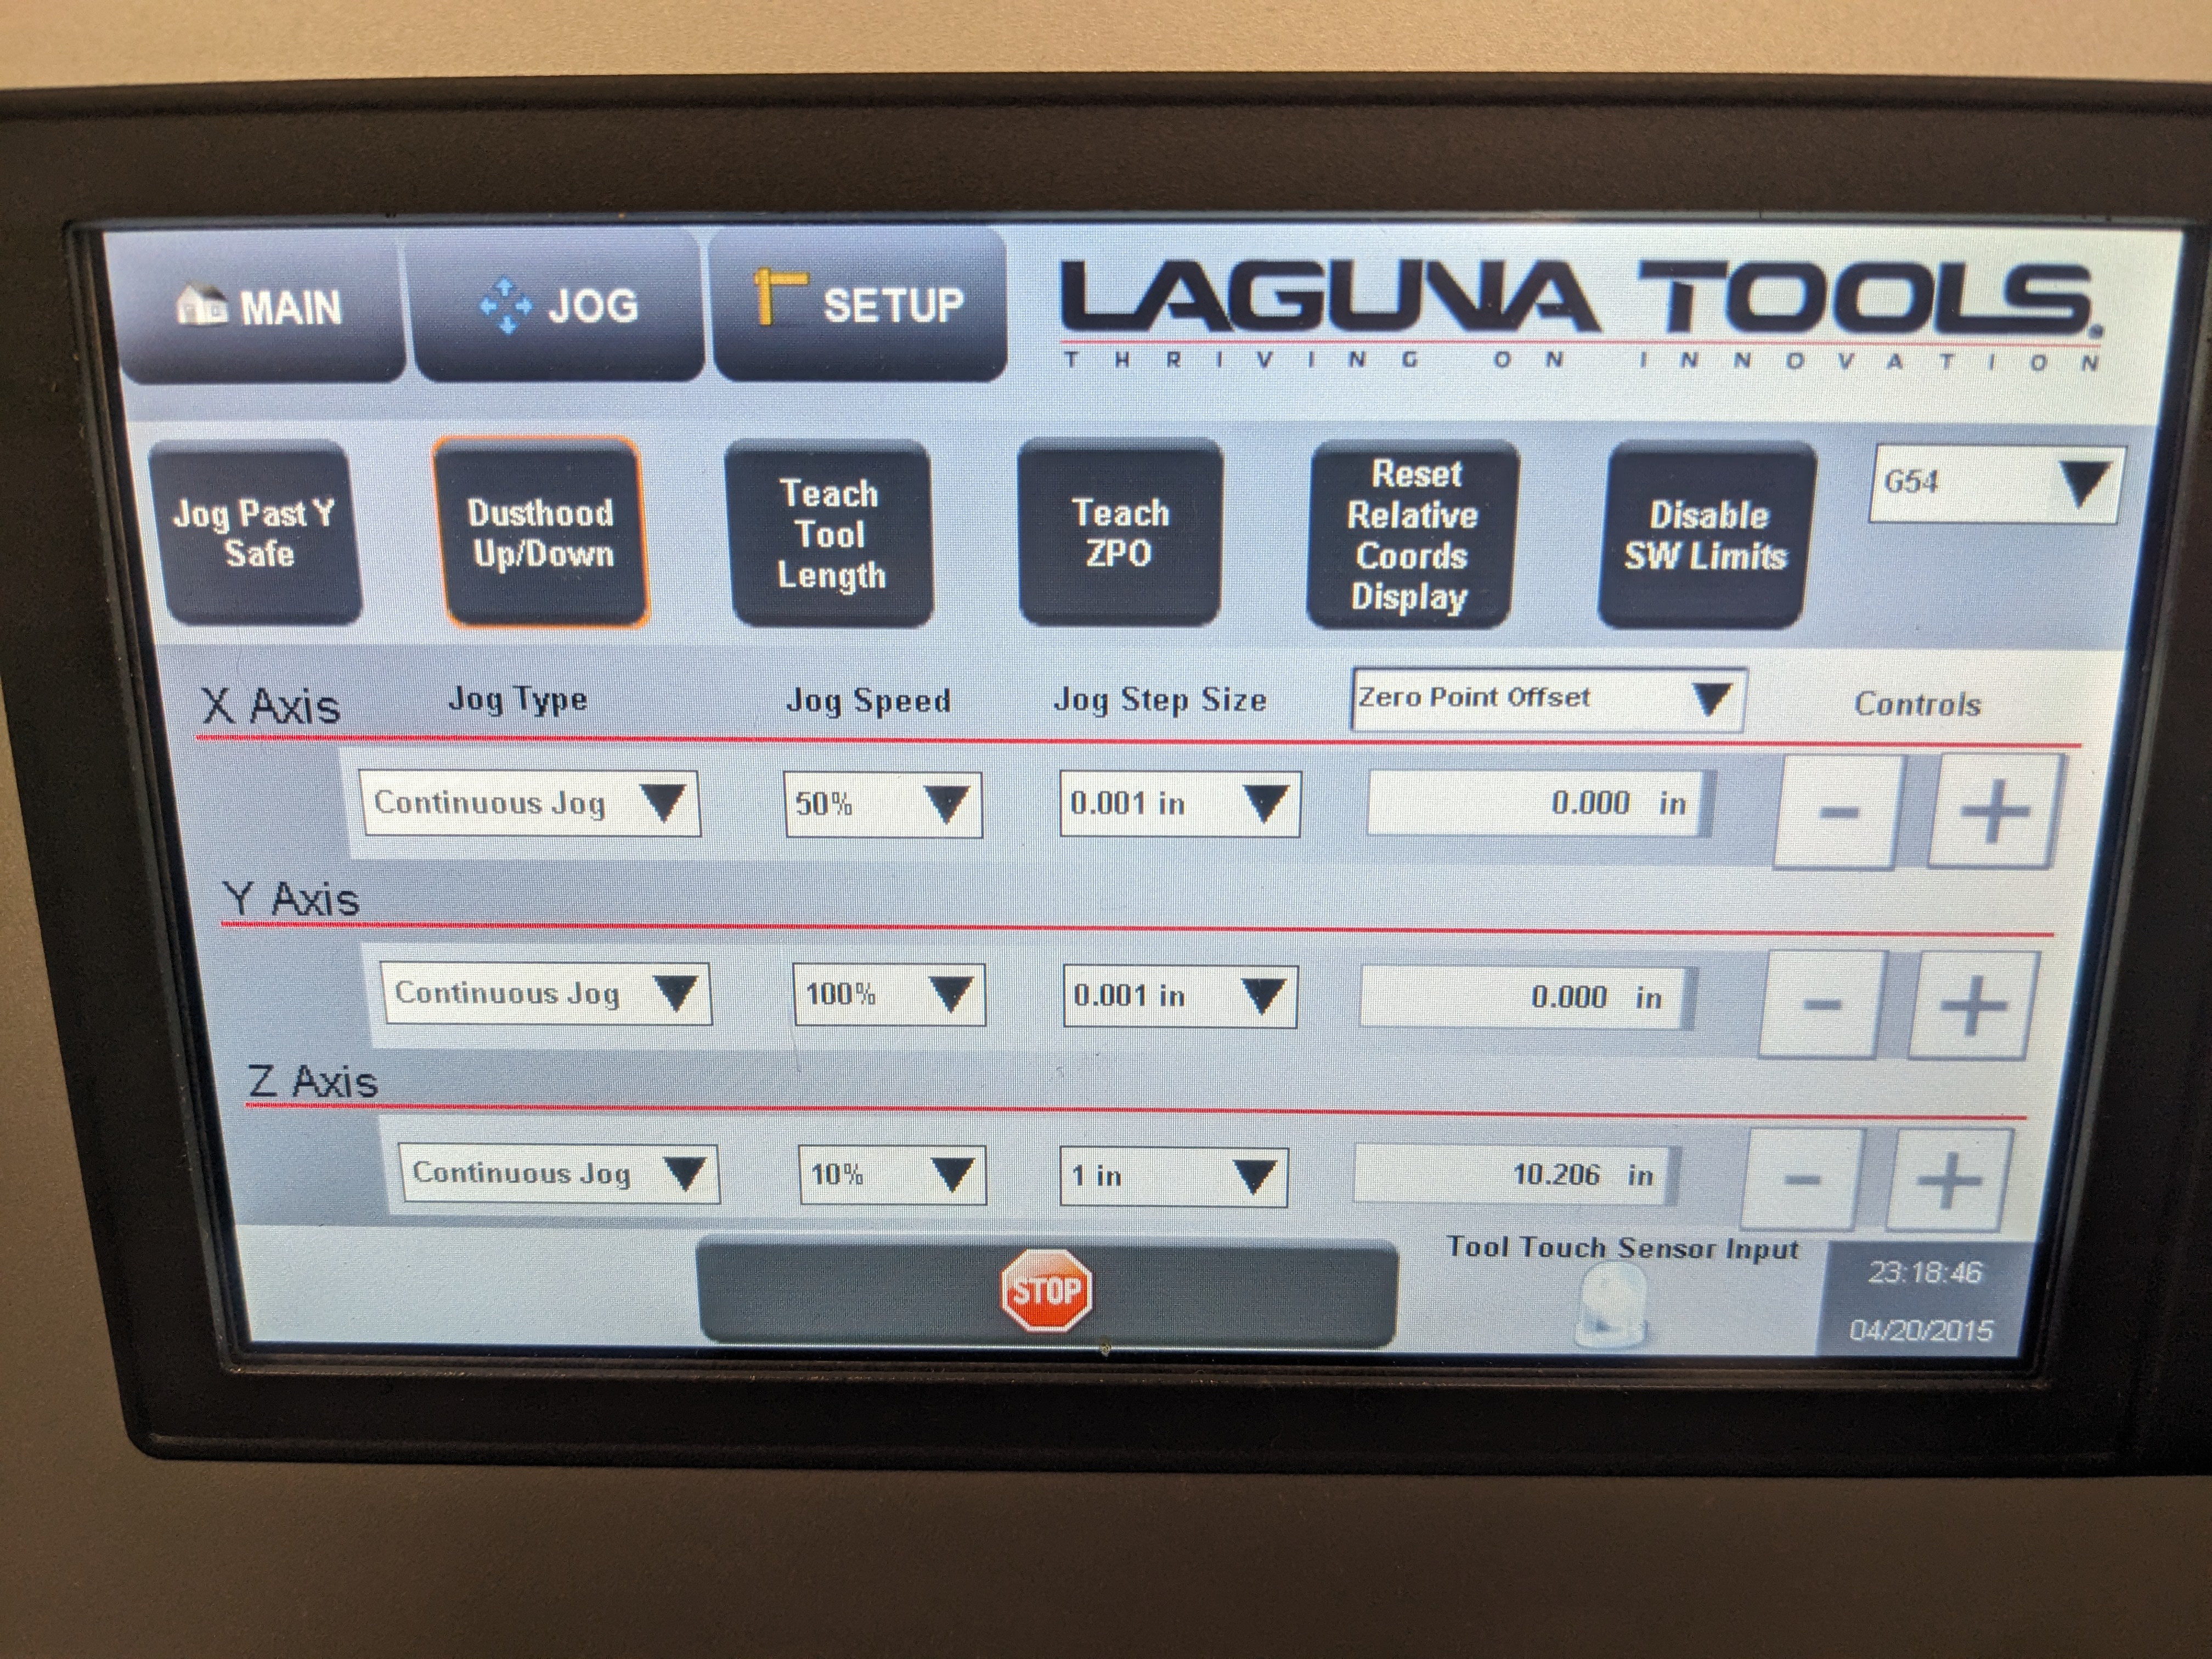
- With bit position over the X,Y origin of the stock, press “Teach ZPO”
- The dust boot can be raised on the Laguna control screen to provide a clear view of bit during alignment
- DO NOT PRESS “Teach Tool Length”, tools should only be zero’d using the auto touch off system
- Verify X,Y origin was set correctly
- With “Zero Point Offset” selected from the drop down (not Machine Coordinates or Relative Coordinates), verify X Axis and Y Axis read <= 0.001 in

Pausing a Program
- To pause operation, press “Hold” from main screen
- Spindle remains ON by default when paused
- Spindle can be stopped (optionally) via
- Main > Settings
- Set “Spindle Override” to 0%

Resuming a Program
- If spindle was turned off, (0%), set “Spindle Override” to 100%
- DO NOT resume cut operation with spindle at 0%, this could damage bits or the machine
- From “Main” tab, press “Run”
Emergency Stop
- The emergency stop buttons on the Control Box or Remote can be pressed at any time to immediately stop all machining.
- Program stopped via E-Stop cannot be resumed (i.e. E-Stop is not a pause)


